Sub-Total: $0.00
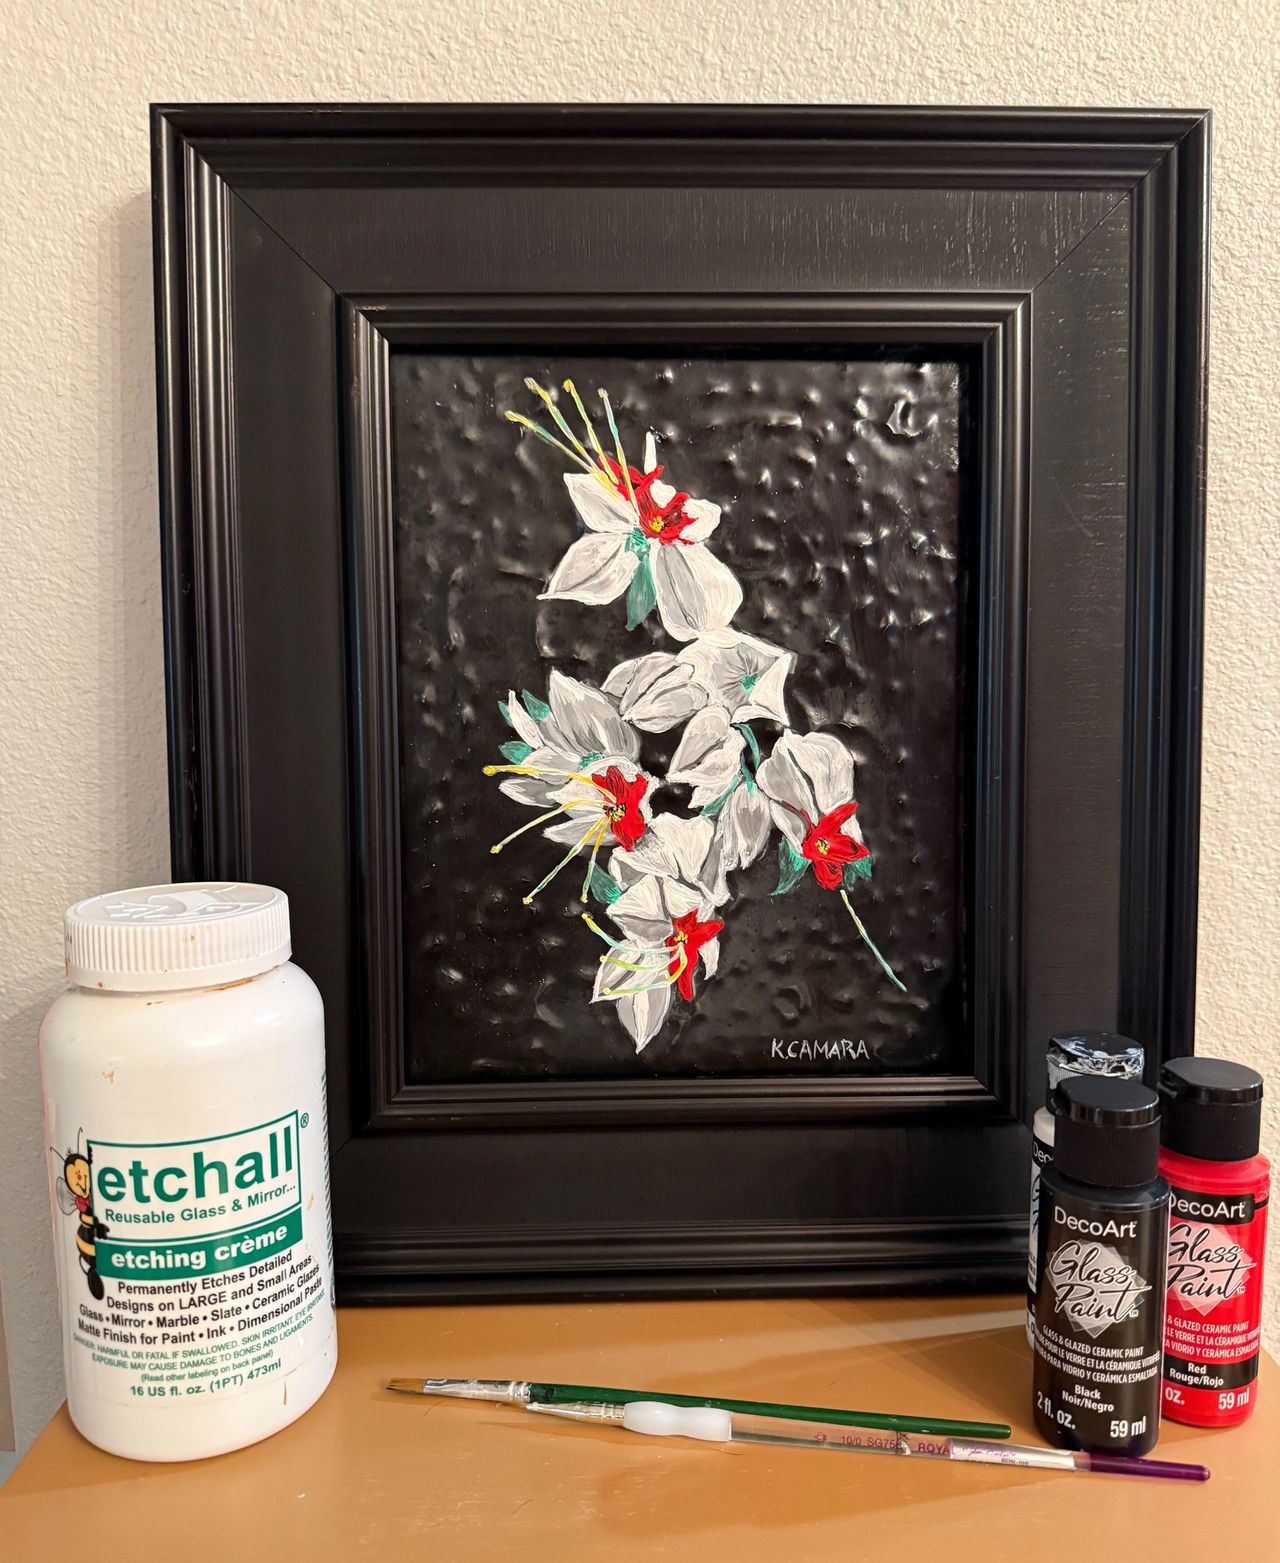
Paperwhites by Kathie Camara

I belong to a Facebook Group called Free Reference Photos for Artists. Photographers post wonderful photos they have taken in the hopes you will use their photo in your art, giving you Carte Blanche permission to use their photos. I had saved this gorgeous photo by Sei Nakatugawa and hoped to paint it one day. Well, I found a great black frame at my local thrift store and thought that this photo would look fantastic as a Fused Glass Art piece. I could also recycle some glass from my stash.
The frame was 13.5” X 15.5” with an 8” X 10” opening. I measured two 8” X 10” pieces of glass from a discarded picture frame. The two pieces have to be cut from the same piece of glass, as different glasses are not compatible and may crack after fusing. Glass fusers know about this (COE Coefficient of Expansion), but non-fusers probably would not. I cleaned the glass very well with water and alcohol, put one piece on top of the other and placed it in my kiln for a full fuse. This melts the two pieces of glass together, rounds the edges, makes it stronger and sometimes gives it a little texture.

Since I would be painting the white flowers on the front and the black background on the backside of the glass, I had to determine a way to make sure the white paint wasn’t overshadowed by the black background. I wanted to etch the entire back of the piece but only the space where the flowers were on the front. I did not have any transparent vinyl to make a pattern, so I went looking for a roll of transparent Contact Paper. I traced a pattern onto the contact paper, just tracing the outline of flowers – no details. Once done, I cut out the outline using a very sharp Exacto knife.
Please Note: Don’t Do What I Did….I traced the outline on the wrong side of the contact paper. I used the side with writing on it instead of the clear side. So, to fix this error, I had to print the photo of the paperwhites reversed (Inverted horizontally). This was the easiest & quickest way to fix this mistake.
However, it took a couple of tries to get the flowers exactly the same size as the cutout.

I then separated the backing from the Contact paper and pressed it down on the front of my fused glass panel. I made sure I burnished the edges down more than once, as contact paper is not as thick as vinyl and I didn’t want the etching cream seeping underneath and onto the textured surface of the glass. I applied the Etchall Cream to the cutout area and set my timer for 15 minutes. When the time was up, I carefully scraped off the etching cream and put it back in the jar. (YES, you can reuse this cream over and over?) Then I rinsed the rest of the cream off into a bucket of water, removed the contact paper, rinsed again and dried the glass off. (Because I have a porcelain sink and the chemicals in the etching cream can etch the sink, I fill a bucket with water and soap and wash the panel off in the bucket. Then I rinse the panel and throw the water out in the yard.)

Before I thought to etch the backside, I needed to make sure I could see where the white paint would go. So, I put the glass panel down onto the photograph and traced the flowers with a black fine line Identipen. (I always use Identipens as their ink doesn’t spread when you spray them with sealer). Once the tracing was done, I sprayed it lightly with clear gloss sealer, let it dry, then sprayed it lightly again. Then I turned the glass panel over and applied Etchall Cream to the back side of the entire piece of glass so it would be easier for the paint to stick to the glass. The timer was again set for 15 minutes. When the time was up, I carefully scraped off the etching cream and put it back in the jar.
Then I rinsed the rest of the cream off into a bucket of water and dried the glass off.
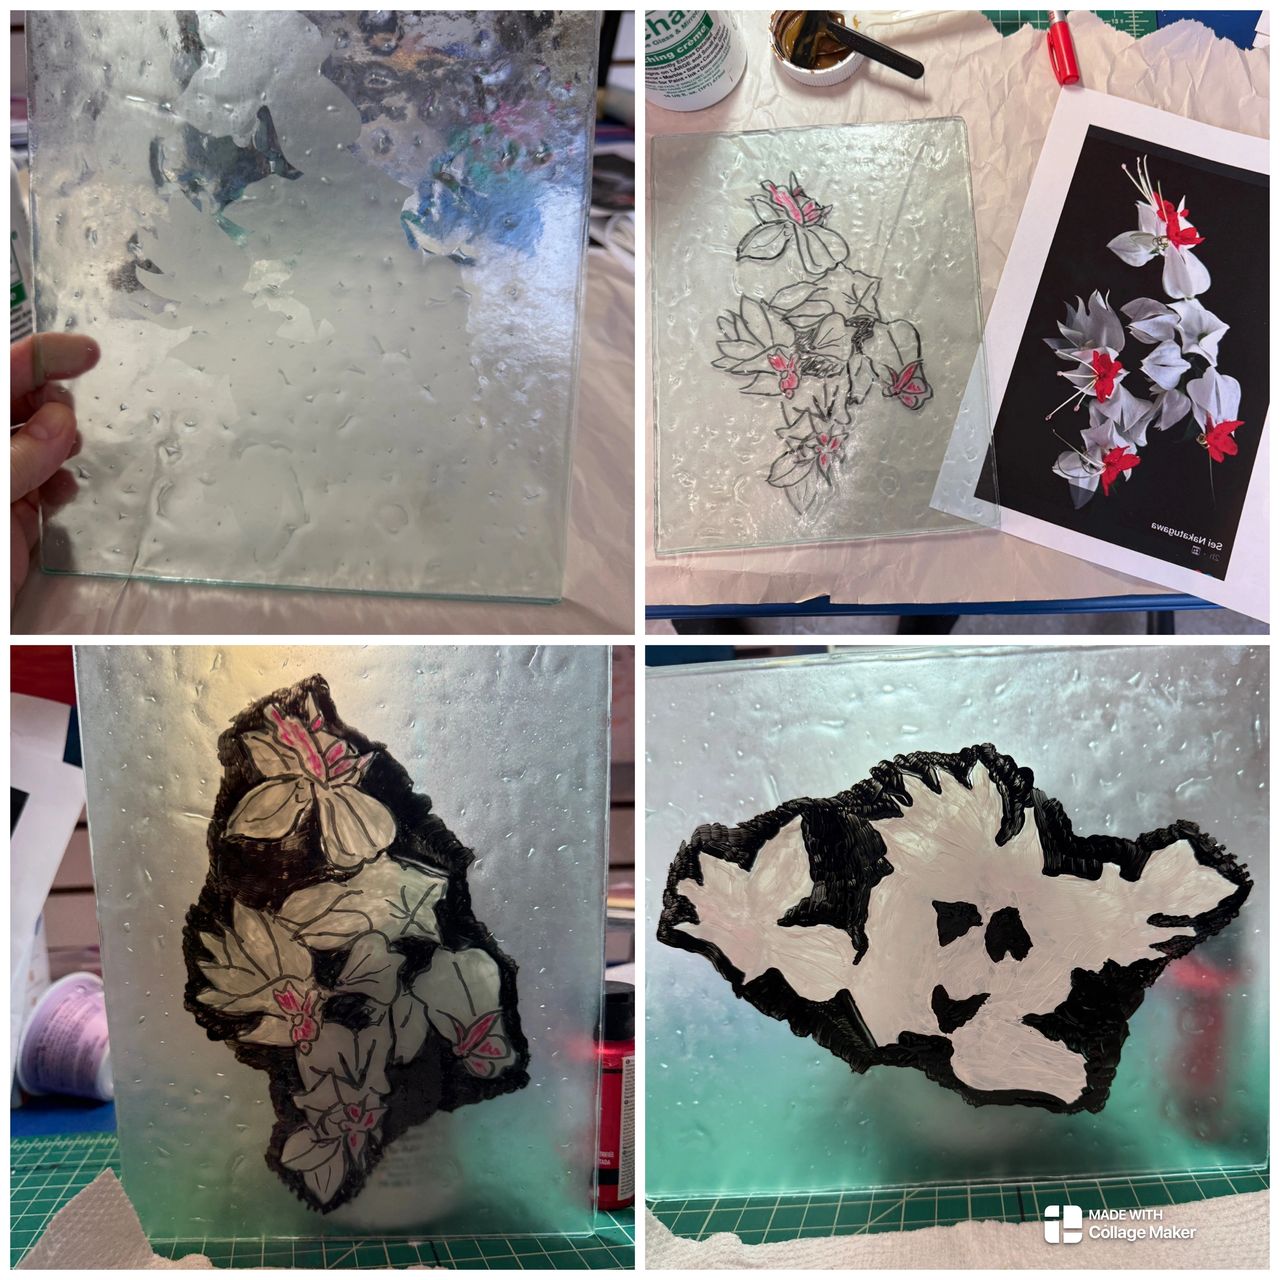
Now on the back of the glass I painted the area where the white flowers would be with the white DecoArt glass paint. I did leave a couple of little spaces/holes where the black background would show through. When dry, I painted around the area where the white flowers are so it would be easier to paint the rest of the background with the black paint. Check out the photo of the back of the piece with the funny Ghost Spirit that showed himself to me. Ha Ha. I finished the rest of the background, let that dry and then gave both colors a second coat to make sure I got good coverage with the Glass Paint.
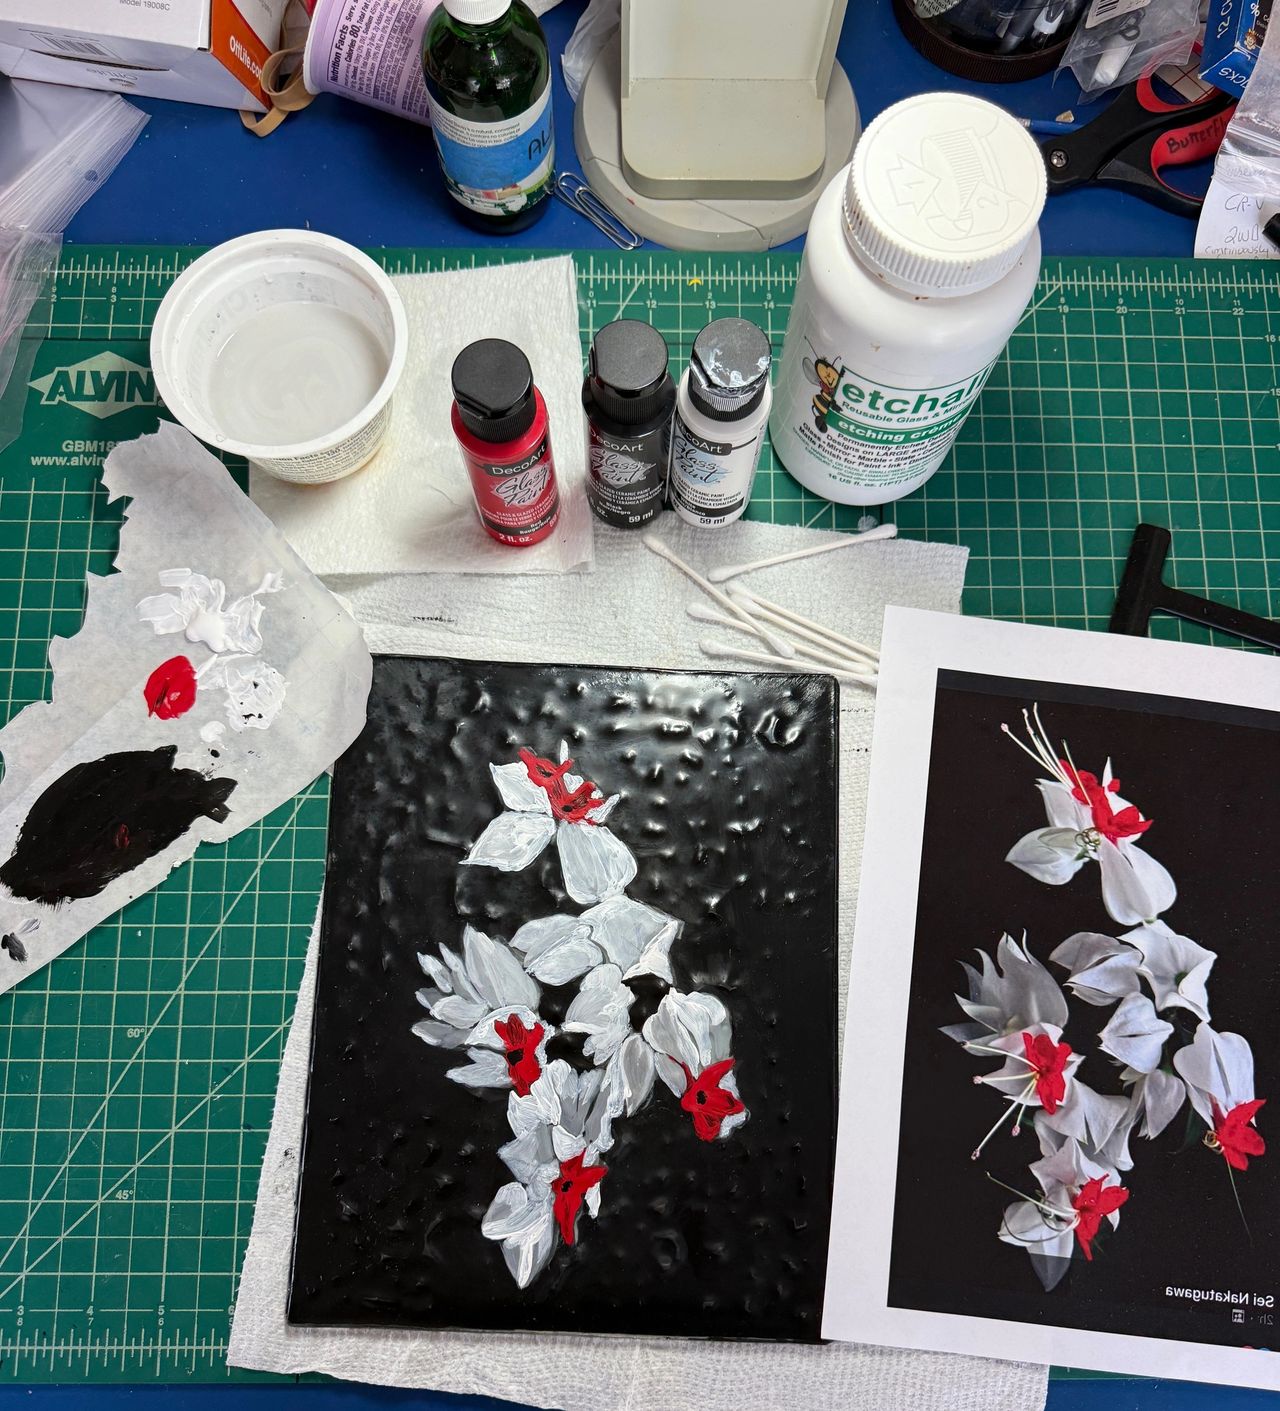
When dry, I turned the glass to the front side and painted the Paperwhites. Again, I had to go over the paint at least one more time to make sure I got good color and coverage. I was really pleased with the results. To make sure the colors stay as vibrant, I again sprayed the frontside lightly with clear gloss sealer, let it dry, then sprayed it lightly again. The DecoArt Glass Paint can be baked in the oven OR just set aside for a couple of days to dry completely hard. I did not bake the paint, as it will be attached to a frame and it will cure on its own in a matter of days. I love this paint, as it is so creamy and the colors are bright.
Here are some tips for spraying an art piece:
Spray Painting Tips:
Make sure to spray in a well ventilated area. Spray very lightly for the first coat to avoid runs. Allow piece to dry, then spray each successive coat lightly. In order to properly spray the piece, you want to overspray. Do not aim the spray at the piece, but start spraying to the left of the piece and continue to spray past the surface to the right. Take note of the temperature directions on the can. Cold spray paint will not work well. (To spray a round piece, place on a lazy susan covered with newspaper. Spray the front, turn ¼ turn, spray next section, etc. until you return to the front. Make sure you note where you started.)

Framing the Piece:
I removed the glass and the backing from the frame and inserted the new Glass Art Piece into the frame. I replaced the backing after giving it a quick coat of black paint, just in case, and then wired the frame for hanging. I am extremely pleased with how it turned out.

Remember to always use Etchall etching cream in your projects. It was voted the BEST by crafters. You can click here to order from the Etchall site and as an Etchall Designer I will get a small stipend that will help me to keep giving you these free tutorials. Thanks.
I hope you enjoy this project. Always remember to “Have A Colorful Day”